I posted a few days ago about "replacing excuses with fresh determination" and one of the things I mentioned doing with determination was a new table for my sewing room. So today I want to show you what I did!
I had seen this blog post about making a custom table using storage cubbies and MDF and knew that would be a solution to one of my problems. I needed a more stable and larger space for cutting fabrics and since I tend to have OCD when it comes to things being organized so using cubbies is a bonus I wouldn't argue with.
I wish I had taken a before picture, but I didn't so you will have to use your imagination and picture a small card table propped up on those under bed raiser things. You know the plastic squares that help give more height to a bed, yeah I used those to give height to my card table. The biggest problem with this was the lack of cutting space because my mat was bigger then the card table so I couldn't use the whole thing to cut. And I had no extra space to spread out on if I had bigger pieces of fabric. Oh and it was a little wobbly, so yeah, lots of issues with my cutting space!!!
In came the idea from the post and I had just so happened to switch out my daughters cubbies for a bin organizer so I only needed one more cubby organizer. I had MDF on hand leftover from another project that happened to be close to the right size so I went out and bought another cubby organizer and got to work.
First I had to rearrange my room to fit my new table, so my house looked like "a training obstacle from American Ninja Warrior" according to my hubby.


The sewing room looked pretty clean as you can see in the back ground, but the rest of the downstairs surrounding it was a giant mess!!!
In came the fitting my new table into the sewing room. I didn't need a big corner desk like the post had and frankly I didn't have the room in what is supposed to be our formal dining room for that, so I improvised. I wanted to use MDF I had left over and it measured 49 inches by 31 inches, the tops of the cubbies measure 36 inches long so my MDF ended up being a bit shorter. No big deal I'll show you what I did to make it work!
So once I rearranged the two desks I had in the room already and had turned the downstairs into the training course I assembled the new cubby organizer. Then I put it and the other one in their new space and measured from the outer edges of each to make sure that they were spaced for the MDF to go right on top.
 |
| MDF in place pushed all the way to wall to start |
 |
| side view of just MDF in place |
I put the 1 by 2 butted against the cubbies on the inside so that the MDF stayed flush with the outside edges, so you won't see the rails when looking at the table unless you crawl underneath. By the way I also had the 1 by 2's on hand from a different project and two that happened to be the same length, I want to say that our rails were about 12 inches long.
 |
| underside of the top with rails in place |
 |
| here's a side view of how the rail is butted against the cubbies |
 |
| one more view of my 1 by 2 in place |
 |
| My 1 by 4 in place at the back of the MDF |
All in all I'm super happy with my project. If you don't already have your wood on hand I would definitely recommend getting the MDF made to the size of the top of the cubbies and the length you need it. I just wanted to work with what I had though to save money. Especially since hubby thought I was crazy when I said that I really was planning to do this. I love my new table though and haven't had a chance to paint because I had a sewing request come in that I need to use the table for now. As soon as I'm done with the project though I will paint the top and extra piece of wood and can update the post with a pic.
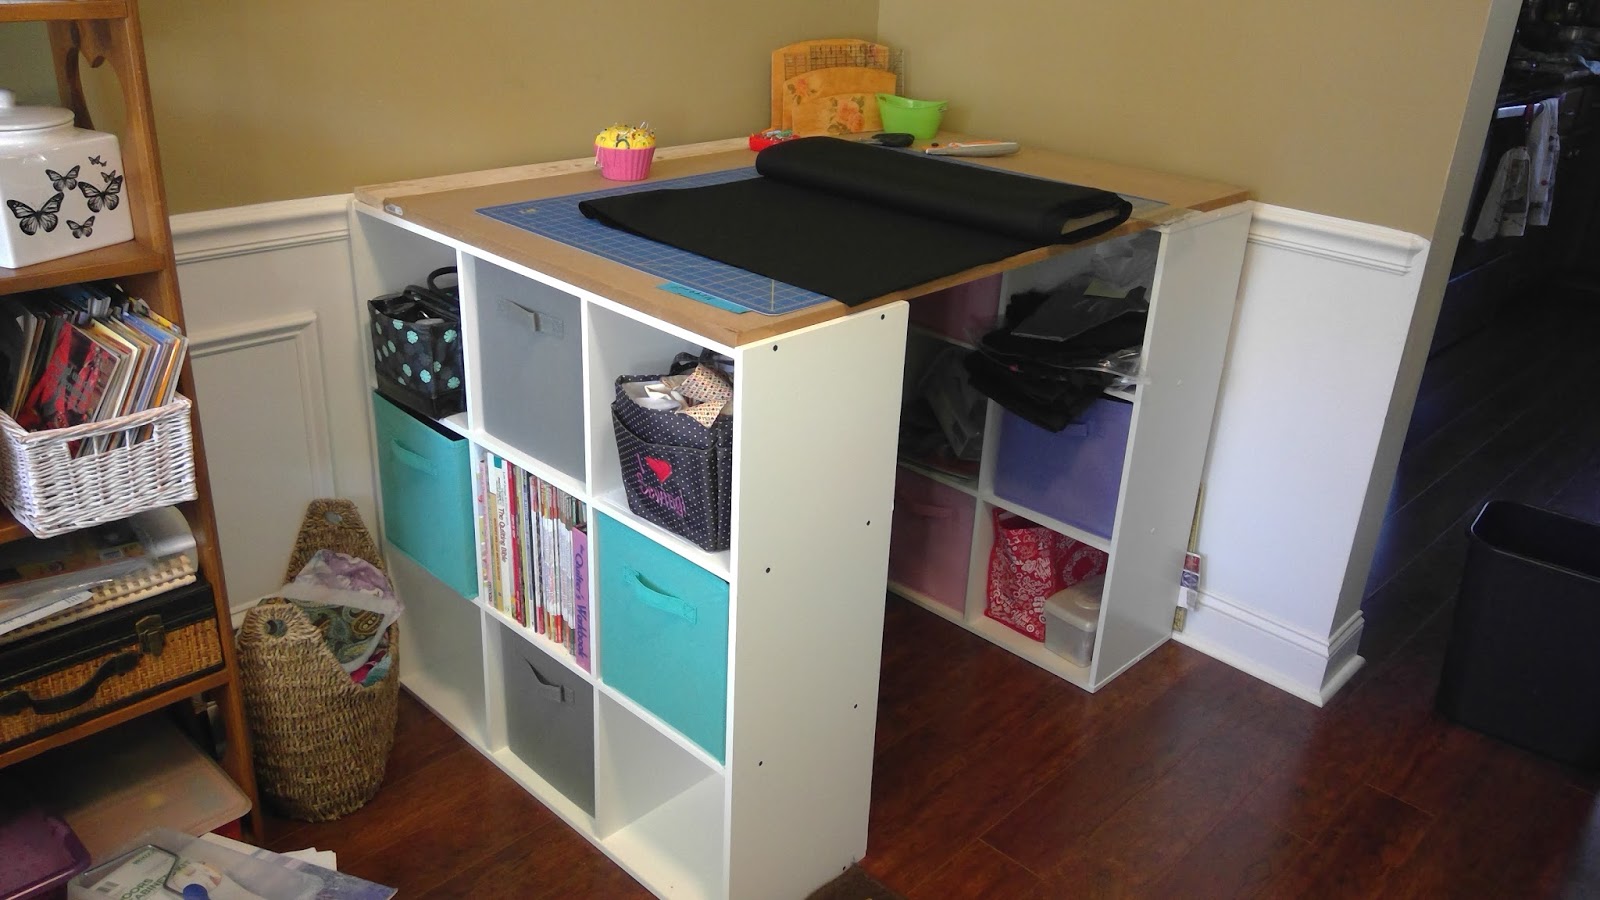 |
| Here's my awesome new cutting table! (minus the white paint still needed) |

No comments:
Post a Comment